WealthRabbit Support
Need Help? We've got you covered
How can I set up my SEP IRA plan for my Partnership through WealthRabbit?
WealthRabbit provides a step-by-step, user-friendly platform to help you easily set up a SEP IRA plan for your partnership. Follow the steps below to complete the setup:
Step 1: Sign in to your WealthRabbit account
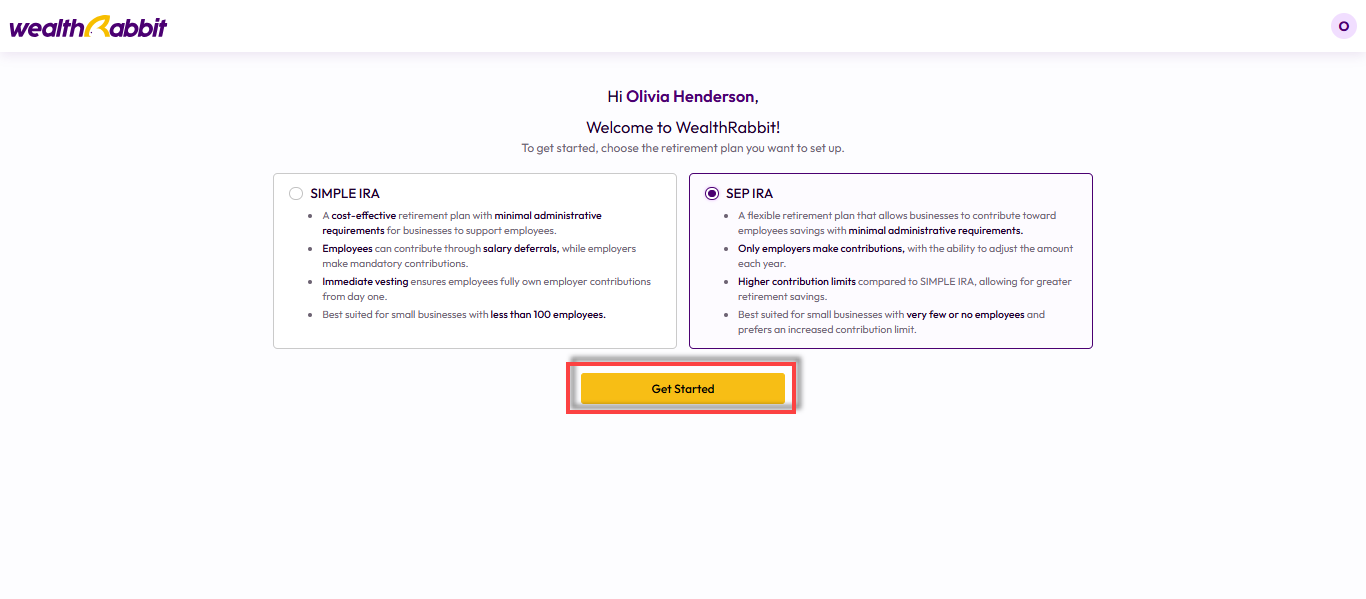
Step 2: Select SEP IRA as your retirement plan.
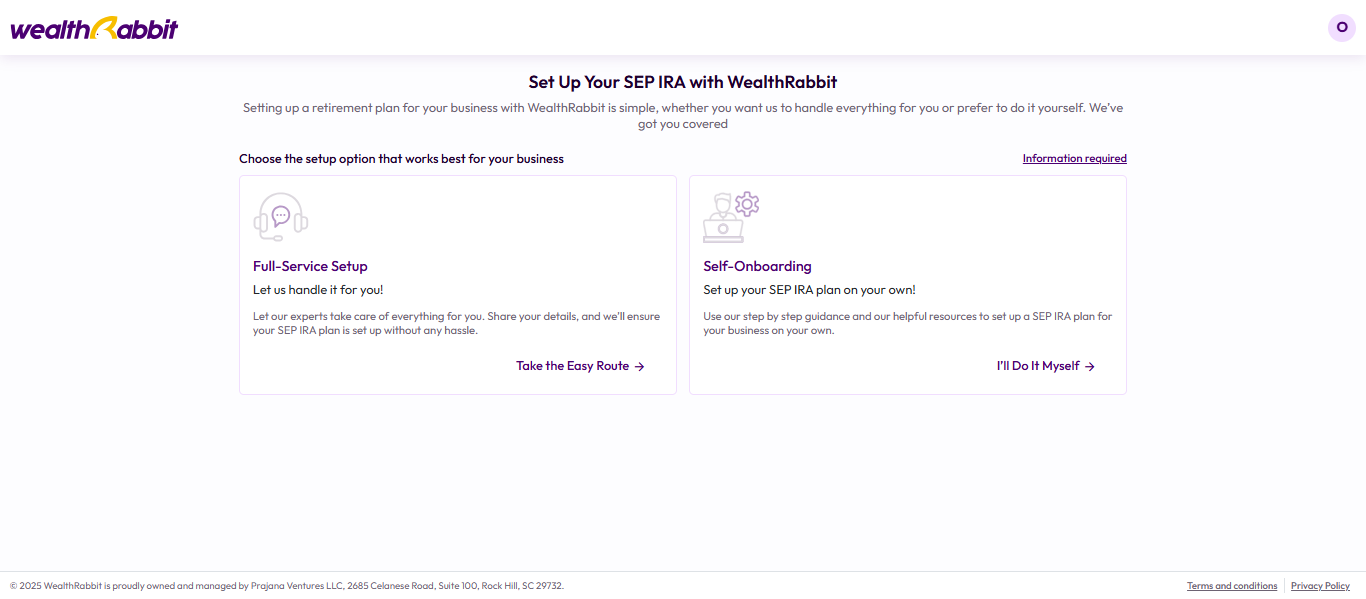
Step 3: Choose your preferred setup method:
-
Full-Service Setup: Our expert team handles the setup for you.
-
Self-Onboarding: You complete the setup yourself with on-screen guidance.
In this guide, we’ll follow the Self-Onboarding option.
Step 4: Complete the two-factor authentication to proceed securely.
Step 5: Enter your business details and select Partnership as your business structure. Then click “Save and Continue.”

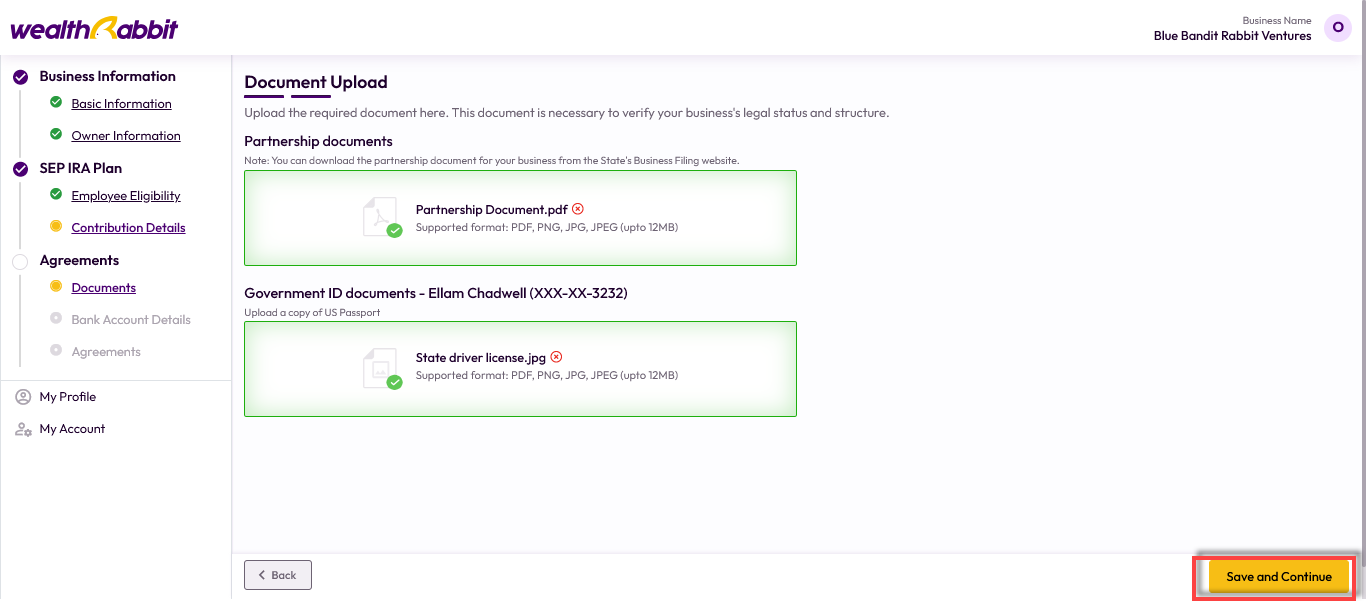
Note: You’ll need to upload your Partnership Agreement during setup. Have this document ready to ensure a smooth process.
Step 6: If your partnership is exempt from identifying beneficial owners, select the relevant exemption. Otherwise, you’ll need to enter the following roles:
-
Beneficial Owners
-
Entity Officers
-
Authorized Signer

Step 7: Click “Add Officer Information” and fill in the required fields, then click “Save.”

Step 8: Review the information and click “Save and Continue.”
To add another individual, click “Add Owner.”

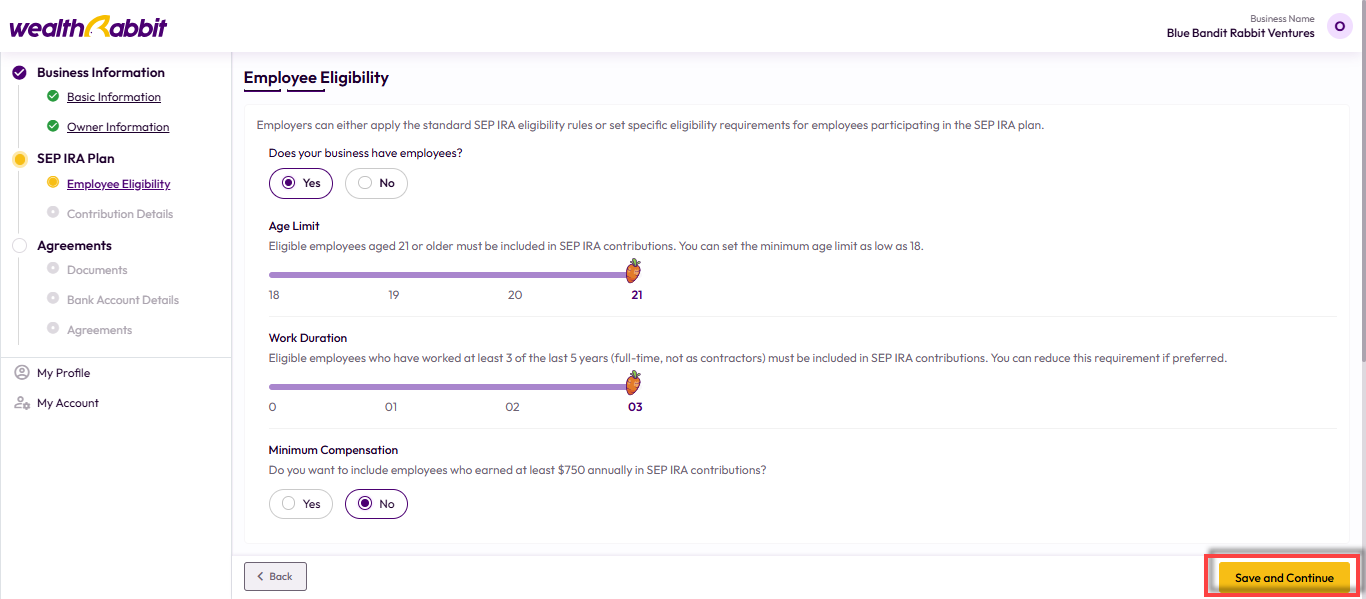
Step 9: Define employee eligibility based on age and length of employment, then click “Save and Continue.”
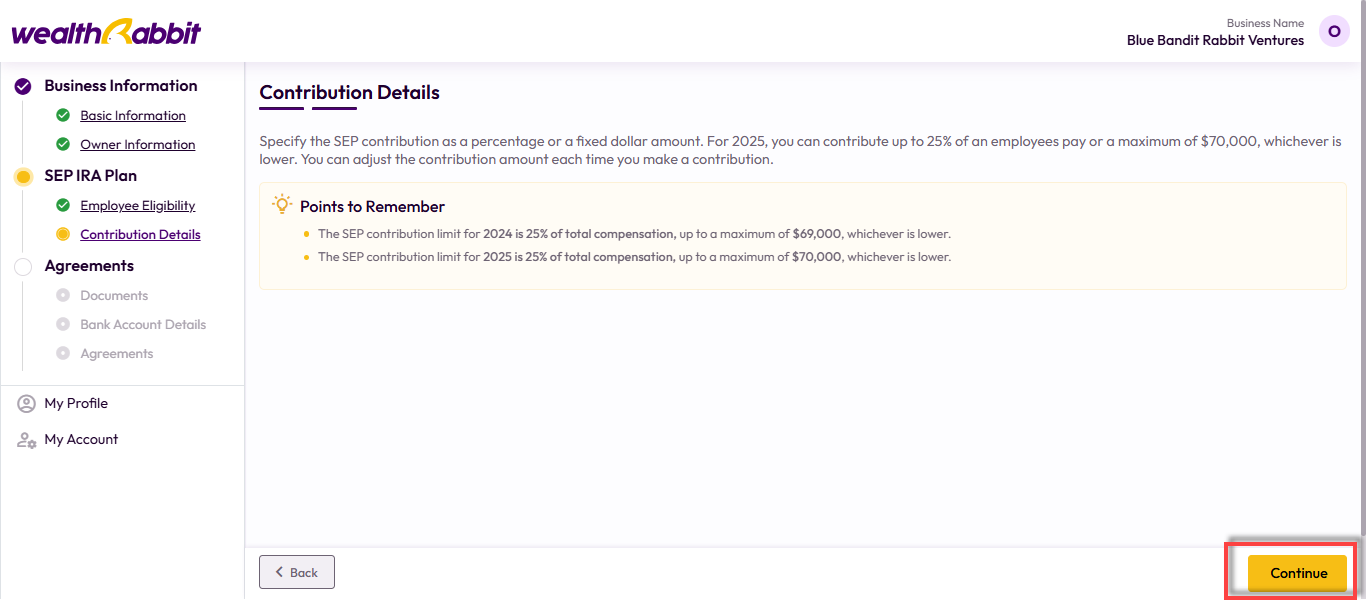
Step 10: Set your contribution type—either a percentage of compensation or a fixed dollar amount. For 2025, the SEP IRA contribution limit is 25% of compensation or $70,000, whichever is less. You can adjust this amount each time you contribute.
Step 11: Upload a copy of your Partnership Agreement, then click “Save and Continue.”
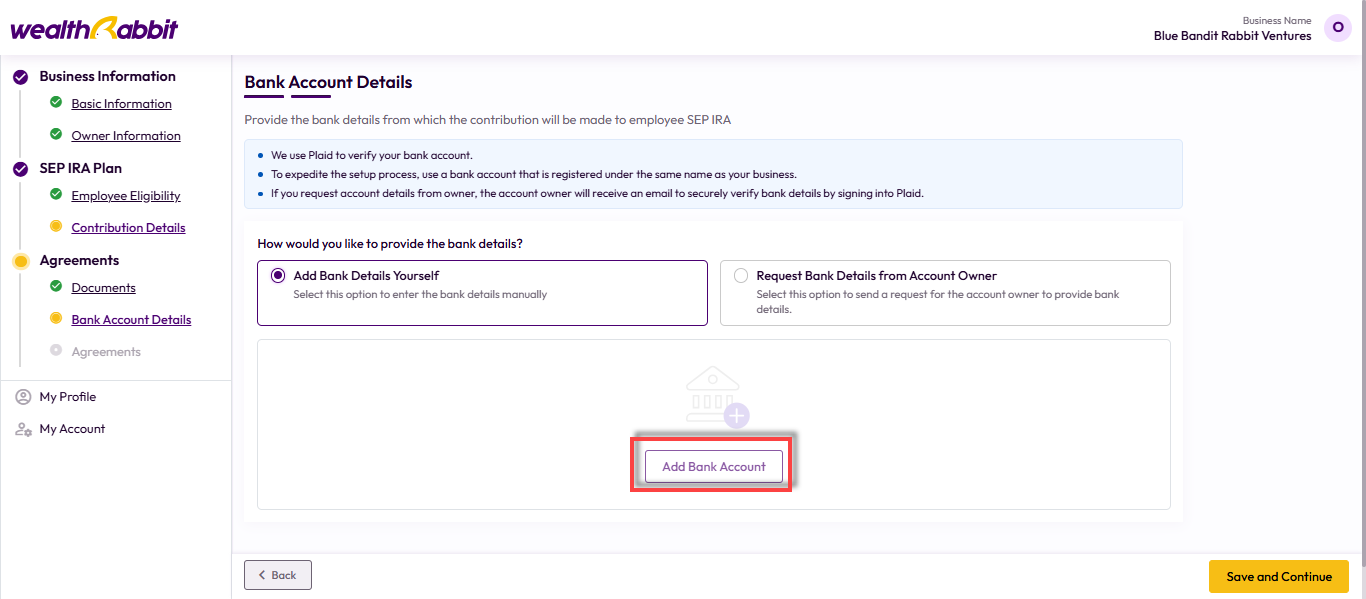
Step 12: Provide the bank details for contribution transfers:
-
Add Bank Details Yourself - Manually input your bank info.
-
Request from Account Owner: Send a request for the account owner to enter their details.
Click “Add Bank Account,” verify the info, and click “Continue.”
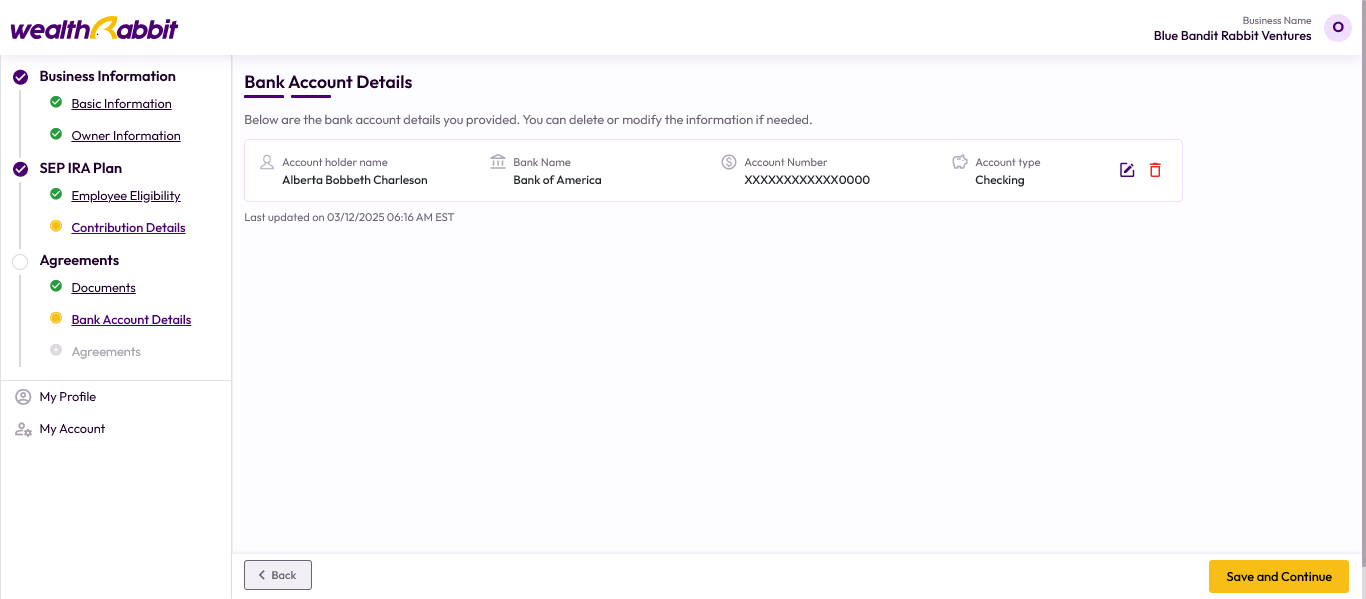
Once you finish setting up your account details, verify them and edit or delete the account if necessary, then click the ‘Continue’ option.
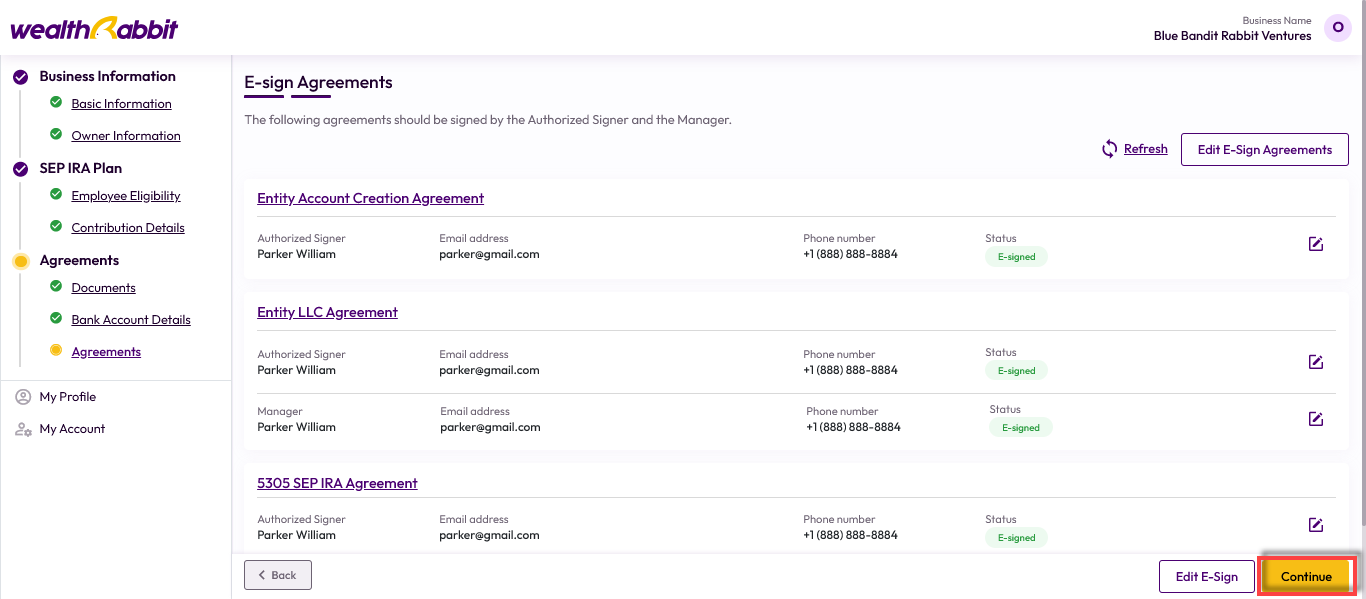
Step 13: Send agreements to the Authorized Signer and General Partner for e-signing.
Note: Revoking an agreement for one person will revoke all related agreements.
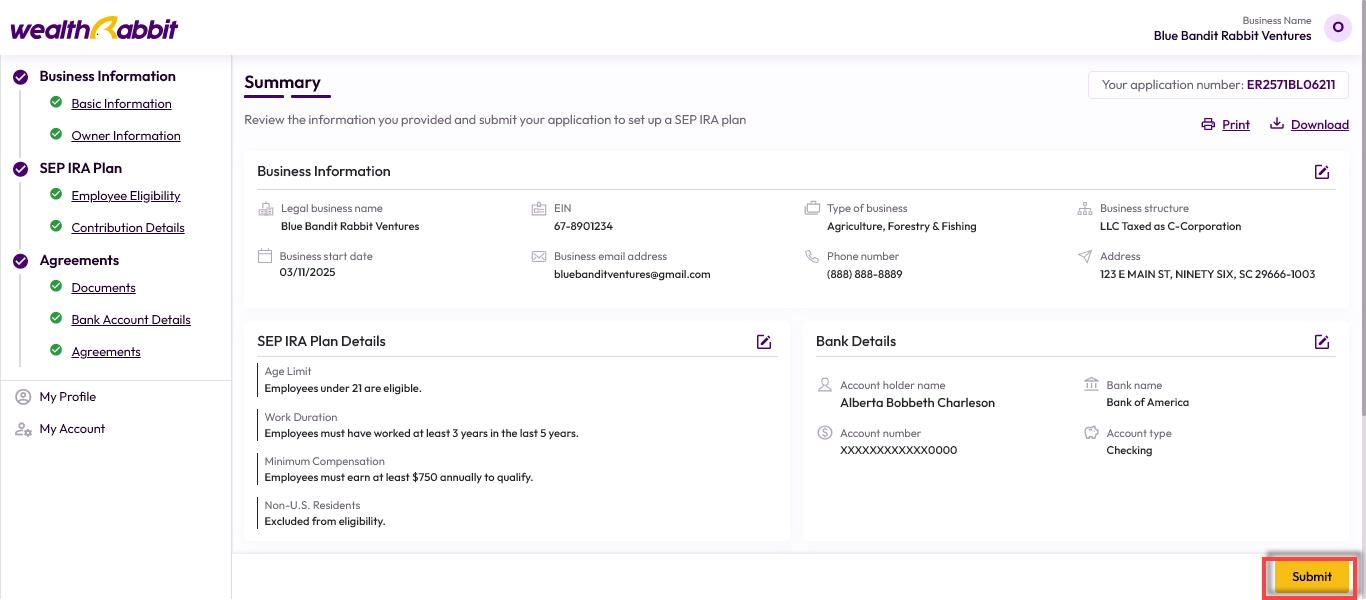
Step 14: Review all provided information, make any necessary edits, confirm consent, and click “Submit.”
Once submitted, your information will be reviewed within 24–48 hours. After approval, you’ll receive a confirmation email and can begin inviting employees to join the plan.
Need more help?
Get in touch with our dedicated support team Contact Us