WealthRabbit Support
Need Help? We've got you covered
How can I set up my SEP IRA plan for my LLC through WealthRabbit?
WealthRabbit offers a simple, step-by-step setup process to help you establish a SEP IRA plan for your LLC. Here's how to get started:
Step 1: Sign in to your WealthRabbit account.
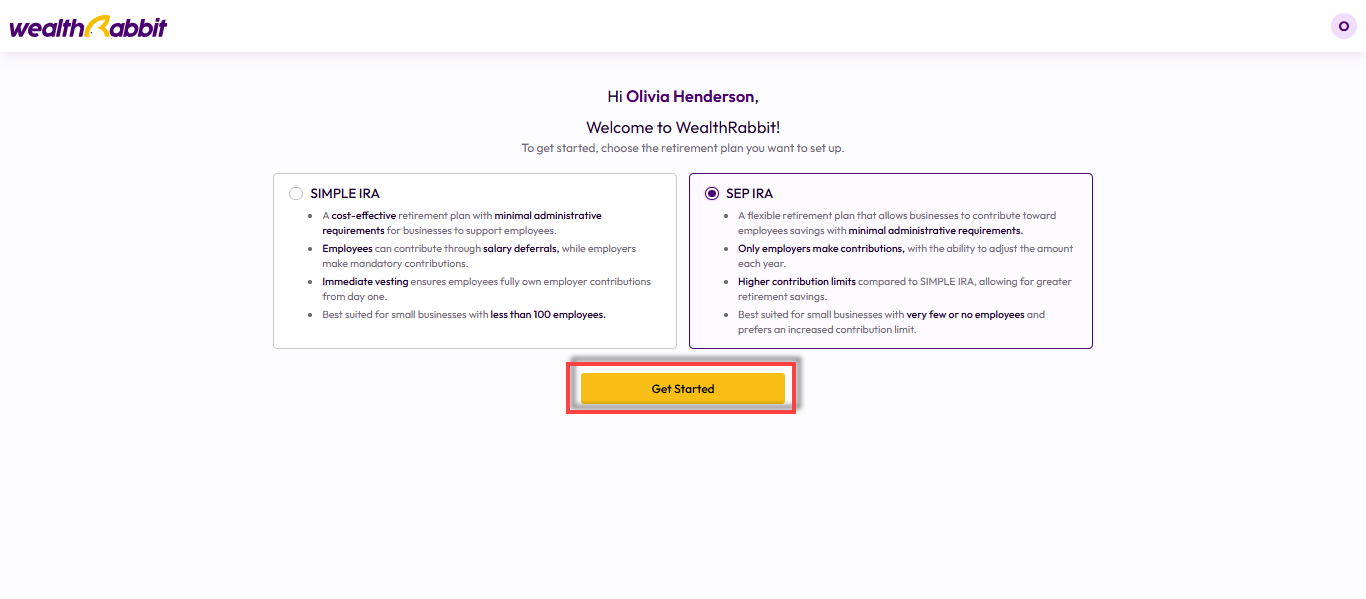
Step 2: Select SEP IRA as your retirement plan and click “Get Started.”
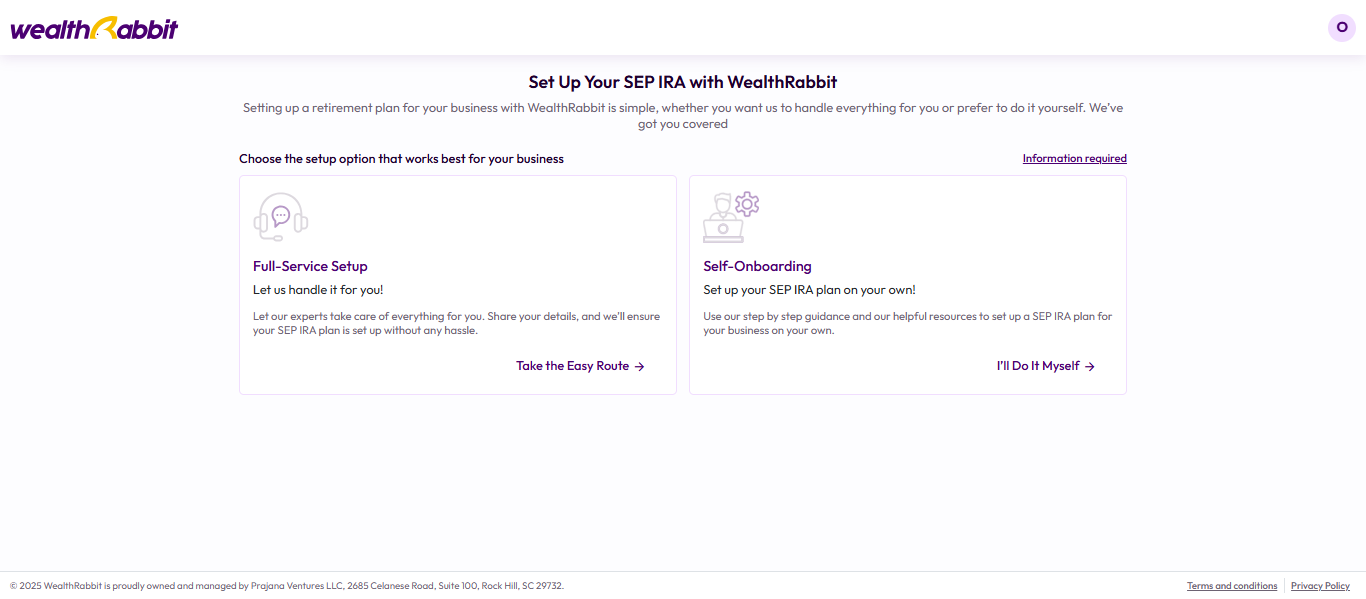
Step 3: Choose how you’d like to set up your plan:
-
Full-Service Setup: Let our expert team handle everything for you.
-
Self-Onboarding: Manually complete each step yourself (we’ll guide you along the way).
For this guide, we’ll walk through the Self-Onboarding process.
Step 4: Complete the two-factor authentication for security, then proceed.
Step 5: Enter your basic business details and select LLC as the business structure. Click “Save and Continue.”
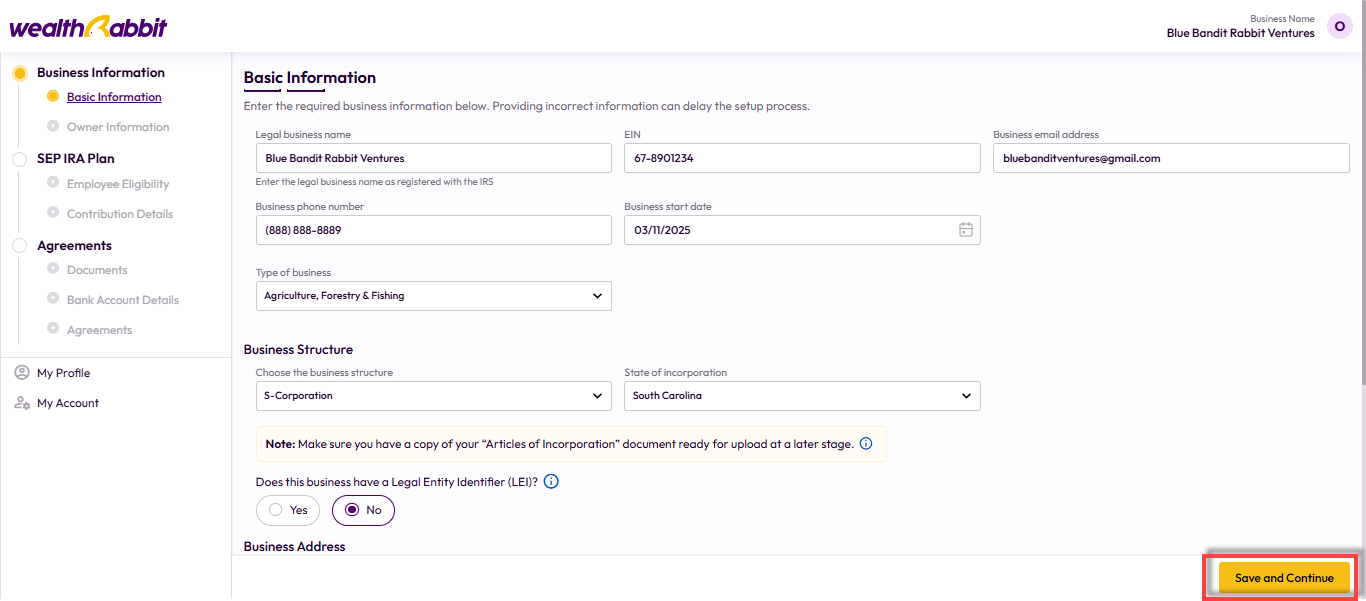
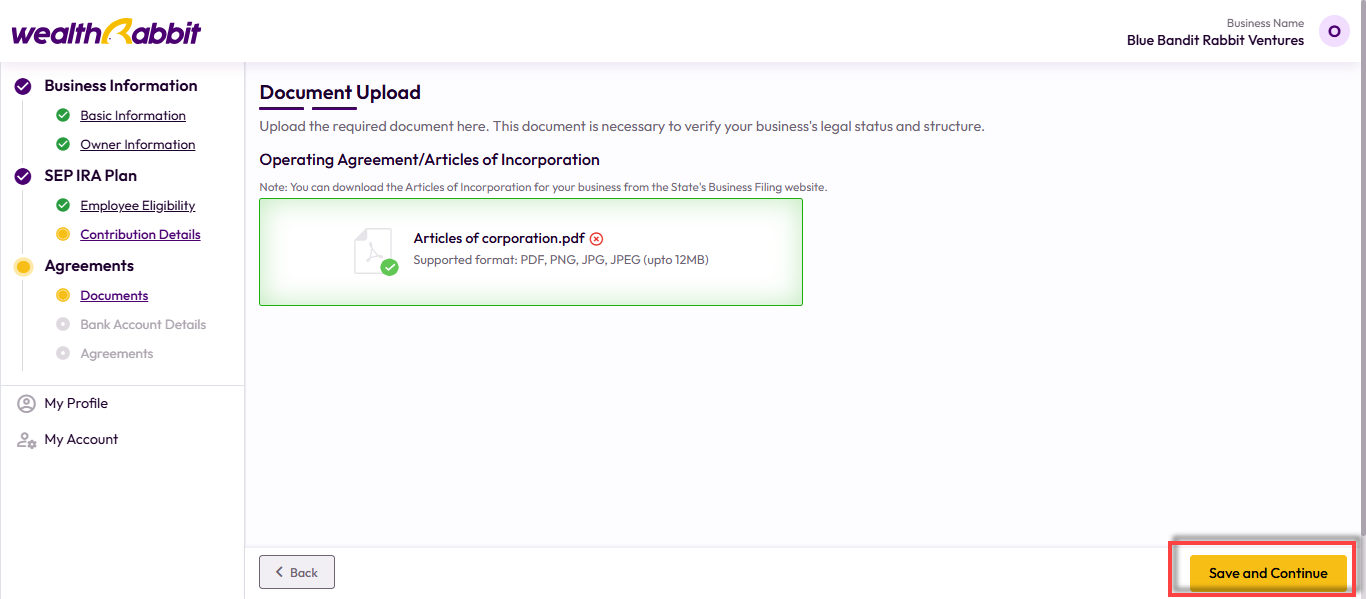
Note: As an LLC, you’ll need to upload a copy of your Operating Agreement during setup. Make sure it’s ready in advance.
Step 6: If your LLC is exempt from identifying beneficial owners, select the appropriate option. Otherwise, you’ll be asked to enter the following roles:
-
Beneficial Owners
-
Entity Officers
-
Authorized Signer
-
Manager
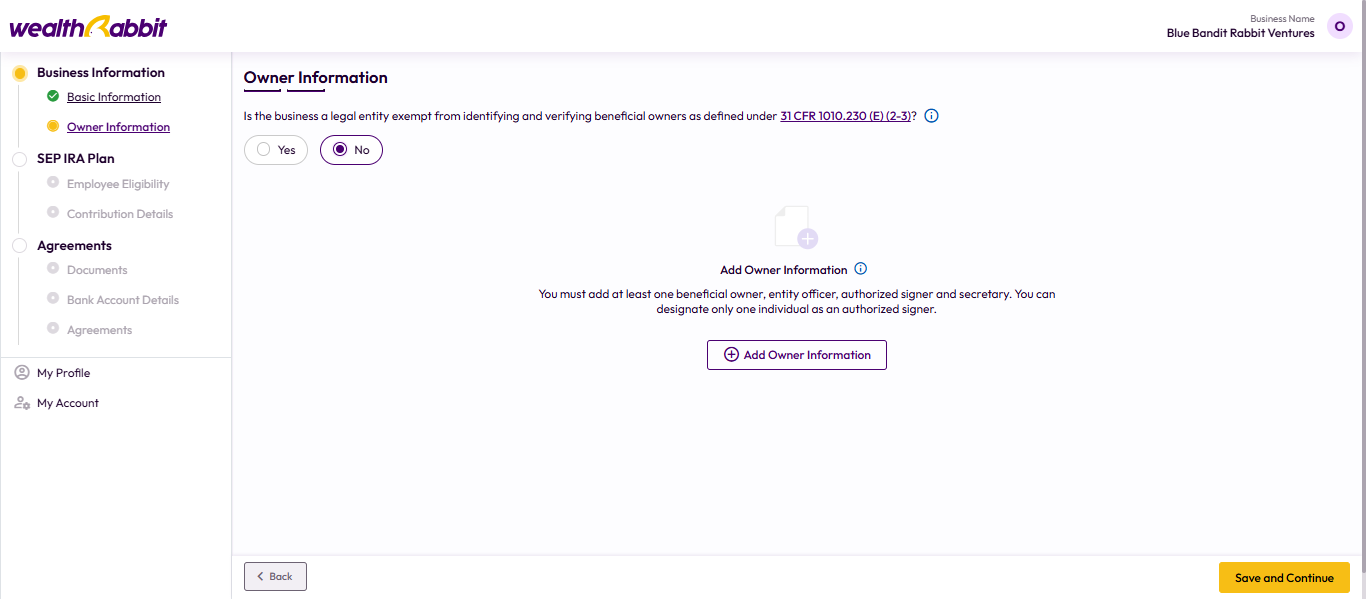
Step 7: Click “Add Officer Information,” complete the form, then click “Save.”
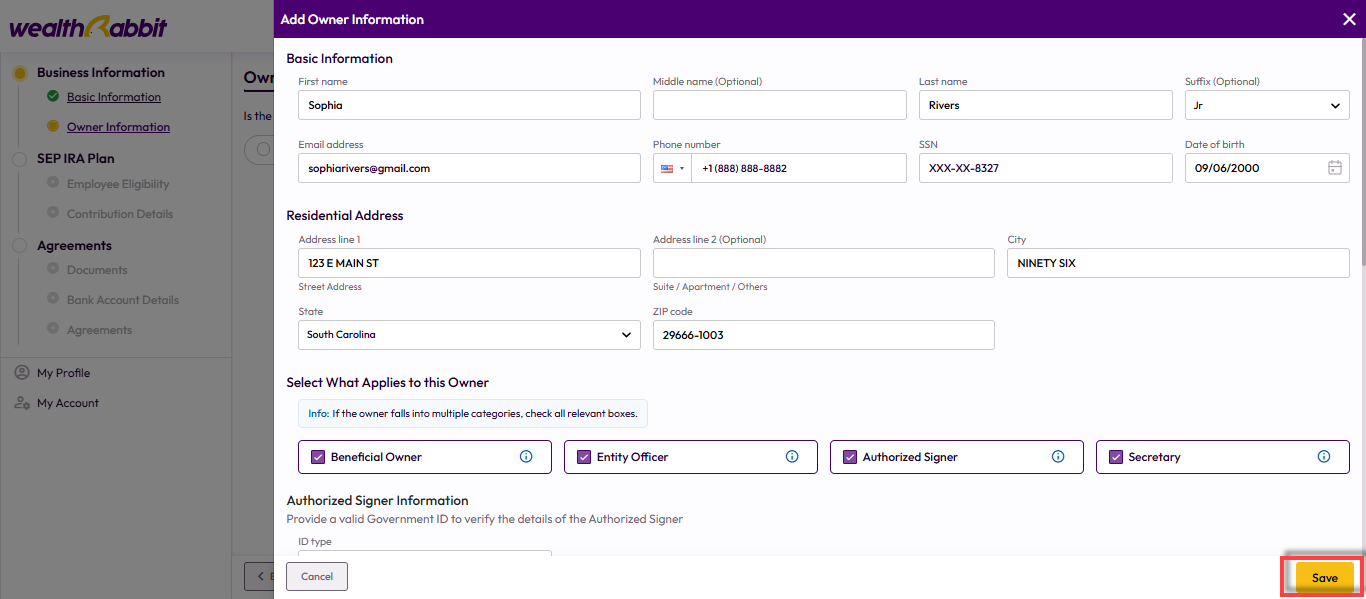
Step 8: Confirm that the ownership details are correct, then click “Save and Continue.”
Need to add more roles? Click “Add Owner.”
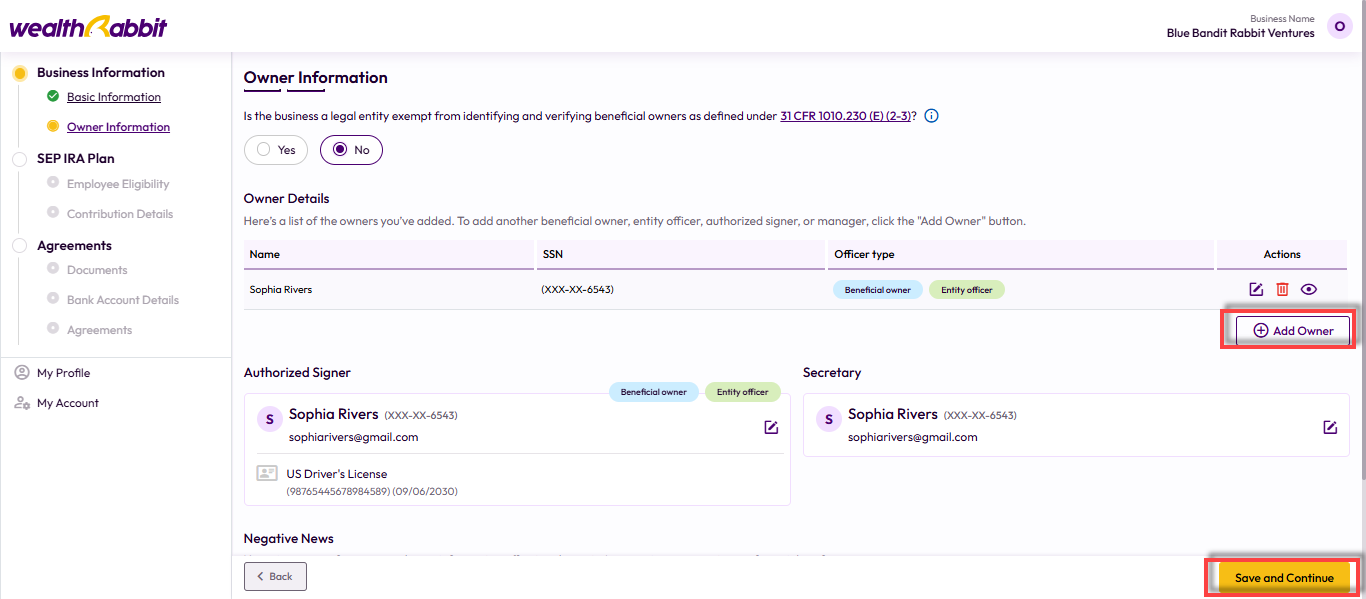
Step 9: Set eligibility criteria for your employees (based on age and work duration), then click “Save and Continue.”

Step 10: Set your contribution preference—either a percentage of compensation or a fixed dollar amount. For 2025, the contribution limit is 25% of an employee’s pay or $70,000, whichever is lower. You can adjust contribution amounts each time you contribute.
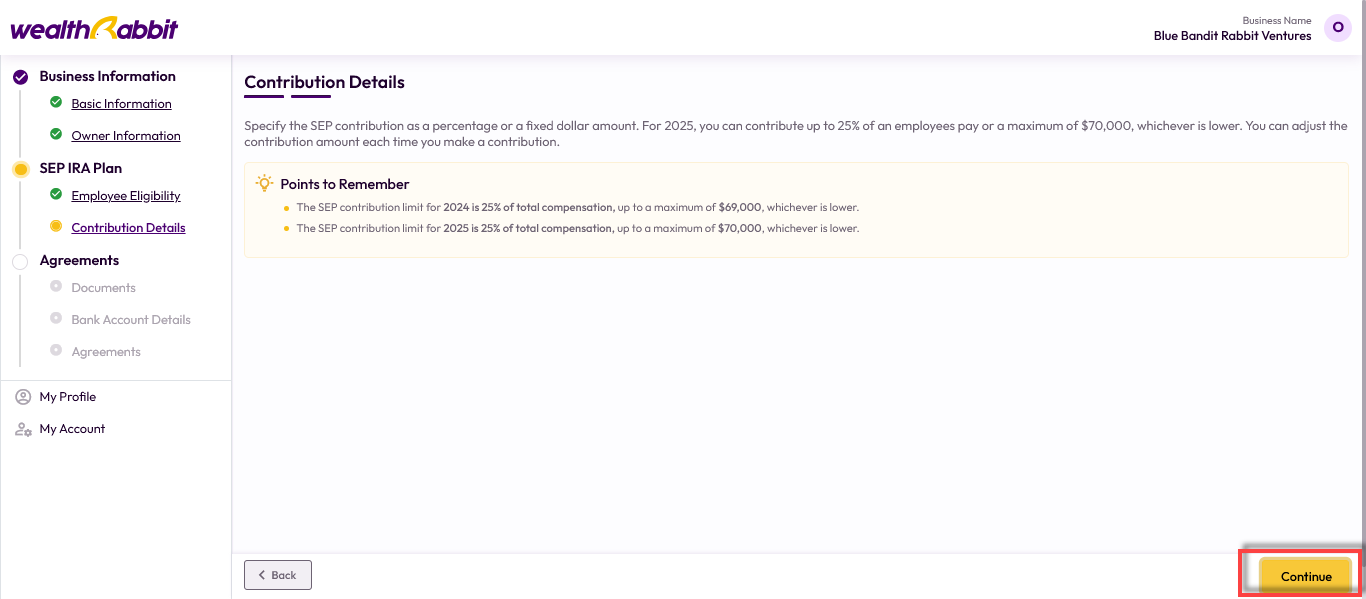
Step 11: Upload your Operating Agreement and click “Save and Continue.”
Step 12: Provide the bank details from which employee contributions will be made:
-
Add Bank Details Yourself - Enter them manually.
-
Request from Account Owner: Send a request for the account holder to input the info.
Click “Add Bank Account” and then “Save and Continue.”

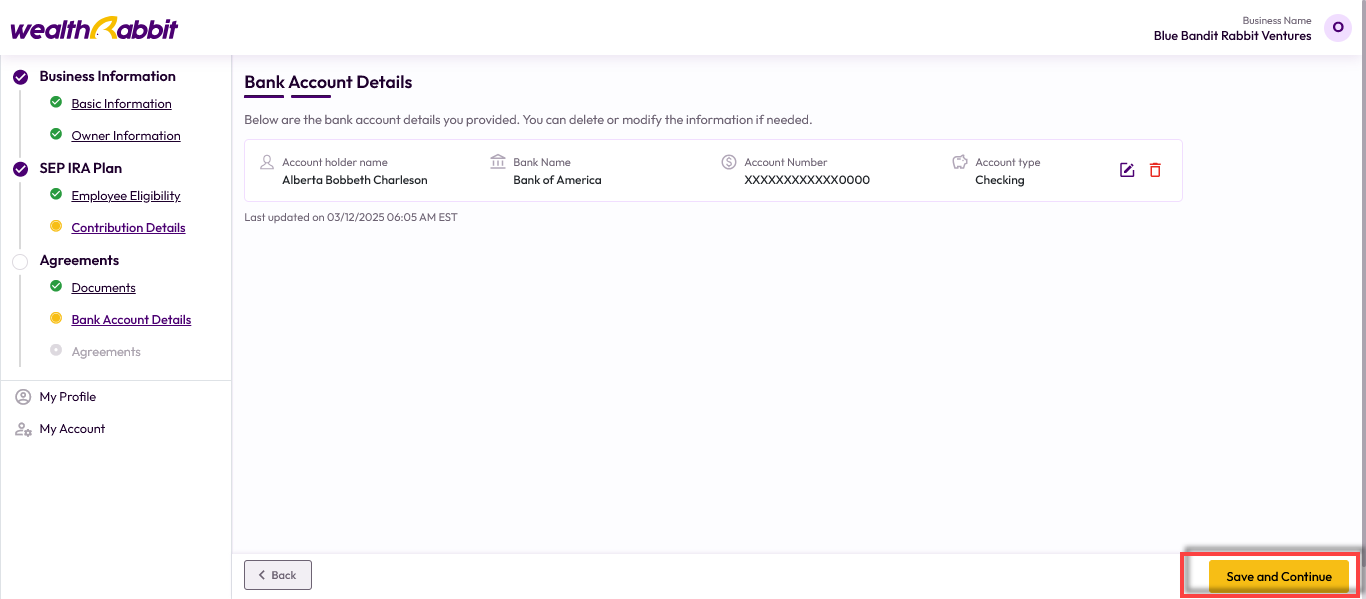
Once you finish setting up your account details, verify them and edit or delete the account if necessary, then click the ‘Save and Continue’ option.
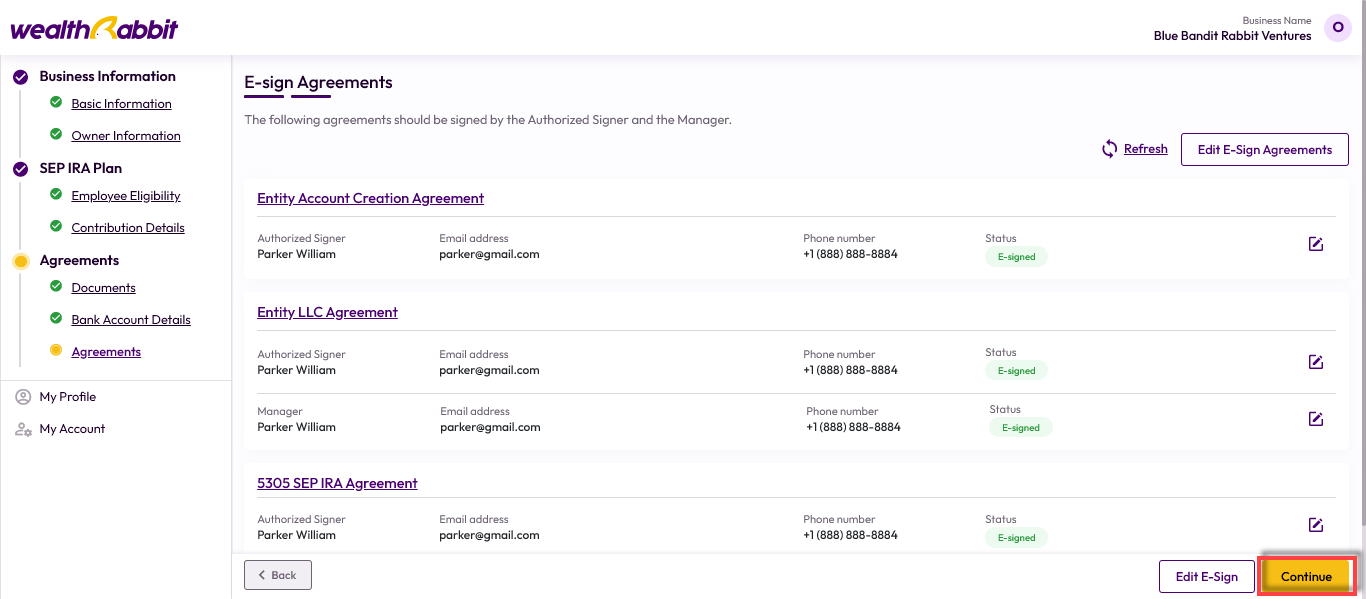
Step 13: Send required agreements to your Authorized Signer and Manager for e-signature.
Note: Revoking an agreement for one party will revoke all pending agreements.
Step 14: Review all information, make any edits, confirm your consent, and click “Submit.”
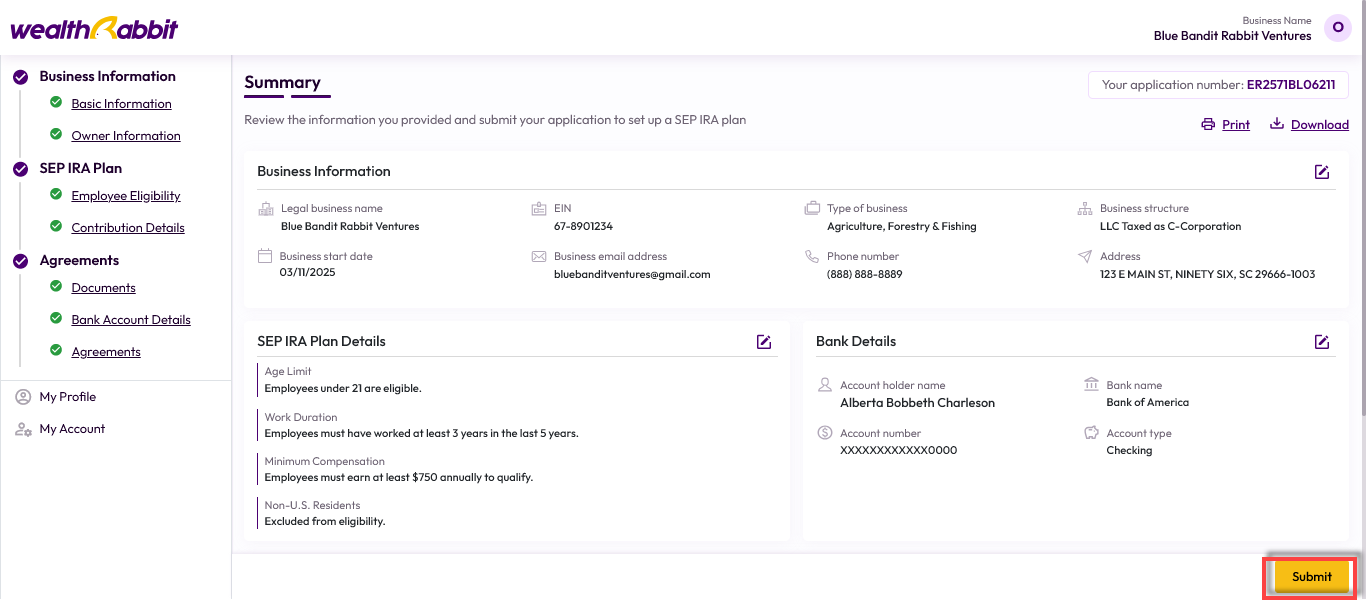
Once submitted, we’ll verify your information within 24 to 48 hours. After approval, you’ll receive an email confirmation and can begin inviting employees to enroll in the plan.
Need more help?
Get in touch with our dedicated support team Contact Us
